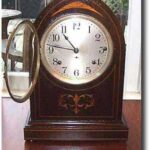
Grandfather clocks, with traditional inner and outer mechanisms, work together in synchronized fashion. When assembling a Grandfather clock, the parts of the clock must be functioning accurately, and assembled in the correct place within the case of the clock, so that other parts of the clock function as well. It is easy to troubleshoot problems with parts or functions within a Grandfather clock, while the clock is being assembled.
Open up the back of a Grandfather clock with a pair of small pliers, if needed. Work on the clock in its permanent area, so the rhythm of the clock is not disturbed, once assembled. Place the parts of the clock that enable it to function inside the back of the clock. These parts are the clock’s inner mechanisms.
Put the mainspring in place. Make sure the mainspring is in good condition, or use a new spring that is made for these types of clocks. Oil the mainspring in the pivot sections with a small dab of clock oil, once it is installed. The clock should be oiled once every three years. Place the gears of the clock inside, and oil the gear wheels, where the teeth of the wheel touch. The oil will keep the wheels from slowing down. Close the back of the clock after inner mechanisms have been assembled.
Hang the weighted chime mechanisms on the outside of the clock. Look for the hook. Make sure the weight chain does not get tangled with the weights, and the weights are in their proper order. Look at the bottom of the weights, where they are marked left, right and center. If the weights get twisted while hanging, untwist the weights, and place back in the proper order.
Attach the pendulum to the pendulum hook. Adjust the pendulum nut, which enables the clock to run faster or slower. Make sure the pendulum bob is facing front. Look for the shiny side of the pendulum bob. This is the lower front of the pendulum. Start the pendulum swinging once it assembled, by moving the pendulum bob left or the right.
Adjust the clock face. Put the minute hand on first in the center over the hub, then the larger hour hand. Secure the hands in place with a hub nut. Twist the hub nut counterclockwise. Do not over twist. Make sure the hands move freely around the clock face after being secured in place. Pull the hands apart gently from the clock face once they are secure if they hit the clock face, or stick together.
Set the time on the Grandfather clock next, by moving the minute hand counterclockwise every half hour, until the clock chimes. Set the minute hand on the hour you want the clock to chime. Wind the clock by moving the hour hand around once counterclockwise. Set the hour hand on the numeral 12. Do not over-wind.
References:
http://billsclockworks.com/opinstructions/chime.htm


