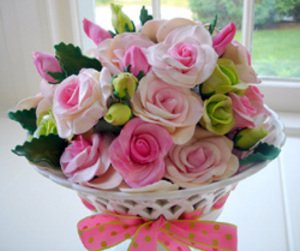
Making homemade crafts with the kids is the perfect way to create an inexpensive Mother’s Day gift that Mom will love. These flower-based Mother’s Day craft projects are easy and fun to make, and will last for years to come.
Mother’s Day Craft: Photo Bouquet
Materials:
Construction paper in several different colors
Pictures of the kids
Pencil
Craft glue
Scissors
Scotch tape
Green chenille stems
Lightly draw flower shapes on the colored construction paper. Use a guide, such as the bottom of a jar, to draw a circle in the center of the flower. Have the kids cut out the flowers. Help them to get the hole in the middle started, but let them cut it out if they can. If you like, decorate each flower around the “picture frame” with beads or glue and glitter. The kids might also enjoy giving their flower its own personal character by drawing patterned designs on it.
Glue the picture to the back of the hole in the middle of each flower. Securely tape the chenille stem to the back of the flower. Arrange the flowers in a Mother’s Day vase you made yourself.
Mother’s Day Craft: Homemade Vase
Materials:
One bottle with a narrow neck
Craft glue
Yarn
One pair of scissors
Take an empty bottle, such as a red wine vinegar or soy sauce bottle, and wash it out thoroughly. This can be done easily by filling the bottle with soapy water and shaking it vigorously. Dry the bottle thoroughly before continuing.
Protect your work surface with newspaper. Start at the bottom, applying a little bit of glue at the bottle base. Slowly apply the yarn over the glue and press it down. Add more glue as you work your way up. Use different colors of yarn to create a multicolored effect. Encourage the kids to help with this Mother’s Day project. Allow the glue to dry completely before placing the craft flowers inside.
Mother’s Day Craft: Terra Cotta Flower Pot
Materials:
One clean terra cotta flower pot
Non-toxic acrylic craft paint
Water based polyurethane varnish
Sandpaper
First, sand down any rough spots on your terra cotta pot. Seal the pot with polyurethane varnish on the inside. Do not varnish the outside of the pot just yet.
Use a variety of colors and designs to paint the Mother’s Day pot. Most polyurethane varnish, even the water based variety, contains chemicals which could be harmful. So, if you do this project with the kids, do the varnish step yourself. Then let the kids have fun decorating the outside of the pot. If you like, you can mark out your designs and the kids’ designs with pencil before you start painting, but this is not a requirement.
After you have finished with the acrylic paint design, go over the design with the varnish. Allow to dry and set for at least one hour, then varnish again.
Mother’s Day Craft: Tissue Paper Flowers
Materials:
Colored tissue paper
Green chenille stems
One straight-edged ruler
One pair of scissors
Get started with this Mother’s Day craft by cutting the tissue paper into small squares about five inches long on each side. Then cut some smaller squares about three inches wide, and some larger squares about seven inches wide. Use different colors tissue paper for a variegated flower. Cut a hole in the middle of each piece of paper. Have the child insert the green chenille stem in the middle of the hole, and twist it around so that it holds the paper petals in place. Cut another small piece of chenille stem and wrap it around the stem just beneath the petals. Arrange the tissue paper so that it is slightly staggered to look like real flower petals.
Following these simple instructions will provide you with plenty of gifts for Mom this Mother’s Day. For more ideas, read Creative Mother’s Day Gift Ideas, Best Sites to Find Free Mother’s Day Poems and Quotes and The Best Free Printable Mother’s Day Cards Online.


