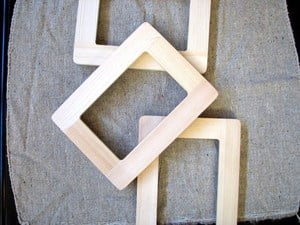
This Vintage Wood Window Shutter Kitchen Table is the perfect DIY project you can make for your kids. After you finish the kids can spend time eating dinner at your new vintage wood shutter table!
This Vintage Wood Window Shutter Kitchen table is perfect for furnishing your retro or vintage kitchen.
You and the kids can make it for your own home over the weekend. Working with all of these materials and paint can sound a little intimidating, but you will be pleasantly surprised how easy it really is!
To make this Vintage Wood Window Shutter Kitchen table you will need to spread it out over a couple days, so working over the weekend will probably work best. While you won’t be working on the Vintage Wood Window Shutter craft project all day long, you do need to allow for time for materials to dry.
To Make a Vintage Wood Window Shutter Kitchen Table You Will Need:
4 or more Vintage Wood Window Shutters
4 sheets of plywood or MDF cut to the same size
8 L brackets
1 Sheet of plywood or MDF for the top
Paintbrushes
Now, on to building the Vintage Wood Window Shutter Kitchen table. Most kitchen tables are about 30 to 32 inches tall. Be sure to measure an existing kitchen table so it will work with your chairs.
The measure your piece of tabletop. This will be the larger piece of MDF you had cut. Everyone will have a different size, so I can only give you tips on how to know how large to make your Vintage Wood Window Shutter Kitchen Table.
Make it slightly smaller than the tabletop. Now, measure how wide the tabletop is. If you had a circle tabletop cut, then mark out a square on it with painter’s tape. Measure this to get the dimensions for your Kitchen table base.
Have your 4 pieces of MDF cut to size.
Now, the first step is to paint the front and back of your sheets of MDF or plywood with the milk paint. Let this dry, and then paint on another coat of milk paint. Each milk paint will be different, so be sure to read your product’s directions.
You can also go ahead and paint your Vintage Wood Window Shutters.
Let all of the paint dry.
Install L brackets to hold the four pieces together in a square. Install an L bracket at the top and bottom of each corner.
Now, use your predrill and some screws to attach your Vintage Wood Window Shutters to the outside of the table base. You want to cover the entire base in the shutters so you cannot even see the MDF. Be sure to line them up with the top an bottom edges of the kitchen table.
You can attach the top of the Kitchen table with L brackets on the inside as well.
Lay your table top on and you are finished. A piece of glass table top will look best, but you can just paint your other piece of MDF to match and use that as a table top.
Check out more of Rebecca’s Vintage Crafts.


