If you’re like me and have been hit hard by the economic times, I put myself on a strict budget for my big day. I knew I didn’t want to add to my thousands in student loan debt for one day, and financially, my wedding was my responsibility. In order to save thousands of bucks, I planned my a little different than the average bride.
My bridal bouquet was one area that I decided to “save a buck” but I didn’t want it to look like it. I did my research and decided on a brooch bouquet. I could make this myself and spend half the price of fresh flowers, if I did it right. I’m sure many of you know what a brooch bouquet is and you might be shaking your head right now because you know what a brooch bouquet is and you know that they can be expensive. Browse etsy or eBay and you’ll find these bouquets cost thousands of dollars. I’m telling you though, if you do it right like I did, you can save a lot of money and have an incredibly beautiful bouquet that is yours forever.
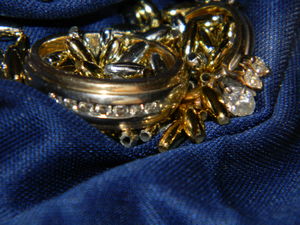
Buy your brooches – Now, I might throw you off a bit here because your bouquet is a “brooch” bouquet but please don’t buy just brooches, use whatever you can find. I used earrings (clip-on and stud), brooches, pins, and rings. Immediately I ran to eBay, but it turned out to be the wrong site to buy these items. The demand for brooches, earrings, and pins on eBay is high, which means the price is also high.
I found my best deals at my local thrift stores, antique shops, garage sales, and estate sales. I didn’t pay over $2.00 for any one item and $2 was my ultimate max, I had to really like what I saw in order to pay that price. Most were $1 or less. I hit the jackpot at an antique shop that had a basket full of “junk” jewelry, $0.50 cents for a pair of earrings or brooch. The “junk” was mostly earrings missing their partner, and jewelry missing one to two crystals. Don’t let this deter you, you can position your jewelry to cover up any flaws on other pieces when arranging your bouquet.
Attach your brooches – Using floral wire (you can purchase this at any craft store) wrap one end of the wire tightly around the back clasp of your piece of jewelry making sure that your brooch covers where you have attached the wire. For jewelry that does not have a closed clasp (i.e. stud earrings) I used E-6000 glue which I purchased at a craft store. To use this method, bend the end of the wire at a 90 degree angle, use a large gob of glue (be generous here) and attach the end laying it flat against your piece of jewelry. The rest of the wire should be sticking straight up in the air. Let it dry like this overnight or even longer for good measure.
Once dry, it’s not going anywhere as E-6000 has an incredible hold. All your jewelry should now look like individual flowers with stems. One important thing to note here is to make sure that after you have attached your brooch to the wire that the wire fully supports your brooch. If the brooch droops or sags you will need to attach another wire or multiple wires until there is no drooping.
Wrap your stems – For me, this step proved to be very important. Using green floral tape, wrap each of your “flowers” stems from top to bottom. This can be a little tricky. You’ll need to slightly stretch the tape as you wrap. It takes on a tacky/sticky texture. This is what you want, it will help in steps to come.
Arrange your stems – This is where your really going to see your creation take shape. A really helpful method to putting your bouquet together is purchasing a bundle of fake flowers to arrange your “brooch” flowers in. The fake flowers cover any gaps between brooches and help keep things in place as you’re arranging. I chose white hydrangea’s, and they looked great under my brooches.
Start by holding your bundle of fake flowers, then begin adding brooches to your arrangement one at a time while using one hand to hold the bouquet and the other hand to place your “flowers” in place. One of the most important things in this step is forming a dome shape that looks aesthetically pleasing. Once you get your shape, twist the stems together, the tackiness of the floral tape helps hold everything in place as you prepare for the next step. Don’t get discouraged if you’re not liking what you see, I took my brooch bouquet apart several times at this step until I saw what I liked.
Wrap your bouquet – Just as you wrapped your stems in floral tape, you will need to wrap the stem of your bouquet. Start from the top and slightly pull the floral tape wrapping your bouquet stem from top to bottom. Again, the tape is going to take on a tacky/sticky texture, and this is just what you want.
Finishing touches – For this step, we will be finishing off your bouquet stem by wrapping it in satin ribbon. Purchase a color of your choice (perhaps your wedding colors). I chose white satin ribbon with approximately a 1 and a half inch width. There are many different ways to finish off the bottom portion of your bouquet. For this reason I suggest performing an internet search using the phrase “hand tie bouquet,” you will get many results as to different ways of doing this step. Choose your favorite and complete your bouquet!
One of the most important things to keep in mind when putting together your brooch bouquet is to improvise! Think creatively, try new things, if it doesn’t work simply take apart what you’ve done and try again. I wanted to add an element to the top of the stem on my bouquet, just under the brooches, I chose feather trim. Some people use ribbon, some use more fake flowers, it’s all up to your tastes. That’s the beauty of being the creator, you can tailor your bouquet to exactly what you want. I loved mine, and I customized it to match the theme of my wedding. I had a lot of fun making it and felt a great amount of satisfaction when I was done. Satisfaction in loving my bouquet, and better yet (in my opinion), satisfaction in knowing that I saved a ton of money.


