When it comes to kids science experiments it does not have to cost you large amounts of money. Most science experiments are cheap and fun to do. The key with science experiments for kids is to make sure that they are safe and educational. The following is a list of several science projects which are simple, inexpensive, safe and educational for your kids. All of the Science experiments for kids listed below require adult supervision.
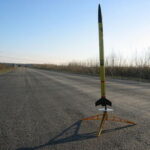
The Chemical Rocket– This is one experiment for kids that my children have always enjoyed. What they learn is how a chemical reaction can build up enough pressure to make a rocket launch. In order to do this experiment you will need the following items;
1. Two empty film containers
2. Baking soda
3 Vinegar
4. Paper rocket that your child has made
Once you have gathered all of your materials you will need to go outdoors to avoid making a large amount of mess. Take your child’s rocket that they made and tape it to the empty film bottles. Make sure that the film bottles are sticking out the bottom and are upside down so that you can still fill them. Once the rocket is securely taped you can begin filling your film bottle with baking soda. Make sure that it is completely packed. Now add a teaspoon of vinegar into the container on top of the baking soda, and quickly place the lid on the container. Make sure that the lid on the container is completely sealed and fits tightly (you may need to add some baking soda to the lid in order to make an air tight fit. Then wait a few seconds and you will see your rocket take off. If nothing happens it could be that your lid is not fit tightly. Try again making sure that the lid it tightly snapped on.
Static Cereal– This is a fun science experiment for kids of any age to learn all about static electricity. You will see how Styrofoam becomes negatively charged and how that charge can cause the cereal to jump. To begin you will need the following materials:
1. Aluminum pie plate
2. Rice cereal
3. A ball point pen
4. Wool Scarf
5. Piece of Styrofoam
After you have all of your materials you are ready to begin the experiment. First you will need to use the pen to poke a hole in the middle of the pie plate. If you have difficult doing this with the pen you can use a knife or thumbtack to make the hole and then place the pen in the middle. Now place several pieces of cereal into the pie plate. Next you will need to charge the Styrofoam by rubbing it quickly with the wool scarf for several minutes. Now pick up the pie plate with the pen and place the pie plate on top of the Styrofoam and watch your cereal pop out. Don’t touch the pie plate with your hand that’s what the pen is for. If you touch the plate the charge that has built up will transfer to you instead of causing ht cereal to jump. If it does not work the first time you may need to build up more of a static charge.
Grapefruit Battery– This is another science experiment for kids that is fun to do together. It shows kids how a simple piece of everyday fruit can be turned into an electric battery. You will need the following items:
1. 2 Large grapefruit
2. 4 copper wires
3. 2 extra large paper clips
4. 4 pennies
5. Small hand held digital clock
6. Scissors
7. Knife
Once you have all of the items listed above you can begin by having your child clip one of the extra large paper clips to one of the copper wires. Then tie one of the pennies to the second wire. With your third wire you can attach a penny to one end and a paper clip to the other end. Use the last piece of wire to attach two copper pennies to each side. Next squeeze your grapefruit to get the juices flowing. Now using the knife you need to put two cuts large enough for the paper clip and penny to slide though in both of your grapefruits. After you have done that put the paper clip with the penny on the end of it into one of the cut and push it halfway in. Take the penny on the other end and put it into the cut on the other grapefruit. Using the grapefruit that has the penny inside put the other paper clip on the wire in the second hole. You should now have one hole left on one of your grapefruits. This is where you want to place the last penny.
This should leave you with two loose wires that can be attached to the back of your digital clock. You should see the small terminals where you can connect it. If you have connected everything correctly you should see the clock come on. Then you will see how it is possible for your grapefruit to produce a chemical reaction. The extra wire can be used to replace one of the other wires if the experiment does not work at first.
Odd Colored Flowers– This is a fun science experiment for kids that allows them to see the process of capillary action. They will be able to see the petals change color right in front of their eyes. In order to begin you need the following materials:
1. 4 white carnations
2. Food coloring (various colors)
3. Vase
The first thing you will need to do is fill your vase half way with water. Then add at least fifteen drops of food coloring into the water. Place your flowers into the water and allow it to sit for at least 24 hours. At the end of twenty four hours your flowers will be brightly filled with the colors you have chosen. They will probably look pretty odd, hence the name of the experiment. This is definitely one experiment you can do over and over again.
Make your own recycled paper- This is a great way to teach kids about the paper recycling process. It does take several days to do so keep this in mind when you are first starting your project. You will need the following ingredients:
1. Several sheets or newspaper (any kind)
2. Large bowl
3. Pancake mix
4. Spoon
5. Scissors
6. Strainer
7. Foil
The first thing you need to do is take your newspaper and cut it into pieces, then take their pieces and put them in your bowl. Fill your bowl with hot water, just enough to cover the paper. Using the spoon mix the paper to is all wet. You will then need to let the paper sit in the water for about two hours, stirring it once in a while. After the four hours are up you will see that it is nice and mushy . Once it is mushy you can add a few spoons of the pancake mix and some more hot water. Then stir everything together.
Now you will need to pour everything into the strainer to remove all of the extra water. Lay whatever is left after draining onto a piece of foil. Press together the lump of paper mush that you now have and you will see any leftover water drain out. If there are any spaces or holes in the paper squish them together until it is put together and as smooth as possible. Now take another piece of foil and place it on top. Put several books on top of the foil to act as a pressing machine. You will than need to allow your paper to sit that way for at least two days. This will allow your paper to complete dry. When you are finished you can peel your paper from the foil an you have made your own recycled paper.


