If you’ve window shopped for wigs you’re probably still in shock! Now you need to pick yourself up off the ground and make the wig yourself! You can, you know! Although wig-making is a very detailed art there are some simple wigs you can make without having any experience whatsoever. Use an ordinary headband and you’ll be on your way to making a hairpiece you can definitely wear with confidence!
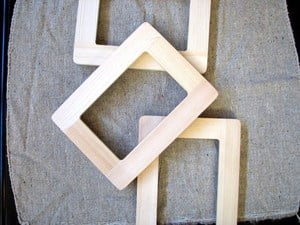
The perfect headband for the wig project is one that is hard and wide. Cloth headbands, and really narrow bands, are much more difficult to use for wig-making. The headband you select can be covered in cloth or can be colored, hard plastic. Make sure it is clean so the adhesive and hair will stick well.
You probably have a store in your town, or a nearby city, that sells hair for wig-making or weaving. Before you invest in quality hair, though, practice with costume hair. You’ll find the cheap hair at many department stores or dollar-theme retailers. This hair is inexpensive and won’t cost you dearly if you make mistakes while wig-making. It’s difficult to find the cheap hair in colors other than dark brown or black. Even if you’re a blonde it’s okay to make the practice wig from darker colors.
You might get lucky and make the perfect wig right from the beginning. In most cases, though, the first wig is where you learn how to make the next ones. You’ll see all the errors of your ways with the first one. The reason you might have some mistakes is that it takes a little practice to get the correct amount of adhesive applied. Put on too little and the hair will fall out almost immediately. Put on too much and the globs can prevent the band from sitting correctly on your head.
Another problem you might encounter is the amount of hair you glue to the band. Put too much hair in and the glue can fail to grab it all. Don’t put enough hair in the headband and you’ll have bare places in the hairpiece. Make one or two cheap wigs and you’ll have the process down pat! And, as mentioned before, you could get lucky and have the first wig turn out perfectly!
Decide on the length of the wig, whether or not you want bangs, and other options. If you want bangs decide how long you want them to be. They don’t have to be cut straight across; they can be longer on the sides and shorter across the forehead. To begin, though, cut all the bangs to the same length; cut all the hair length to the same length. You can later trim the finished wig.
Adhesives you use can vary. Almost any adhesive works to secure hair – that’s not the problem. The glue you choose must be satisfactory for the type of headband you’re using. Glues which are specifically for plastics work well for most headband wig designs. Spray adhesives of any type aren’t recommended, though. Spraying the adhesive can blow the hair and get everything around the hair sticky.
Place the headband on your head and mark the areas, with chalk, to represent where the bangs will start and stop. Cut the hair to the length you’ll need for the hair and bangs, or just for the hair, if you don’t want bangs. Do not cut the hair for the bangs separately from the hair for the back and sides. Position the entire length of the hair in the headband, positioning a short amount so that it will hang down and form bangs, then placing a longer amount that will become the wig. So, when the glue is dry you’ll have short hair on one side of the headband and longer hair on the opposite side. If you don’t want bangs place the ends of the hair in the center, inside, of the headband.
Start by spreading the glue inside the headband. Put the glue on very thick so that you can push the hair into it. If you’re making bangs cover the entire inside of the headband with glue, except for about an inch or so on each end. If you won’t be making bangs add glue to the inside of the headband staying a short distance from the edge. This is done so that the glue is not visible when the wig is completed.
It helps to lay the hair on a piece of cardboard so that it can be manipulated easier. Open the pack of hair and lay it on the cardboard. Spread the hair out like you would a deck of cards but keep the ends straight across. The hair should be spread thin but you shouldn’t be able to easily see the cardboard underneath it. Use enough hair so that it will cover the area marked for the bangs. This first application of hair will be applied to the glue from chalk mark to chalk mark.
Instead of laying the hair directly into the glue it can be helpful to pick the hair up by using a piece of tape. Not only will the tape help you transport the hair but it will also cover the glue. Tear a piece of tape which is equal to the length between the chalk marks. The tape should be a couple inches longer so that it will stick to the cardboard on each side of the hair. Turn the cardboard over, then pull the tape and hair away, so that the tape is underneath and the hair is facing upwards.
Tear another piece of tape and position it over the hair, and over the first piece of tape. Now the hair should be trapped between the two pieces of tape. If you’re making a wig with bangs this tape piece will be several inches from the ends of the hair. If you aren’t making bangs the tape pieces should be at the ends of the hair.
Apply the glue to the headband then place the tape into glue. Allow to dry completely. Now make two more taped hair pieces which will be applied to the rest of the headband. These additional pieces will become the sides of the wig. Glue these pieces on each side of the first application of hair.
When all the hair is in place and the glue is dry comb the wig to remove any loose hair. You can trim the wig yourself or you can take it to a professional to have it done. The wig is easy to put on – simply slip the headband onto your head – and it looks great. The headband easily conceals the fact that it’s a wig and you can wear it with confidence!


